Saturday, May 17, 2008

Saturday Challenge!!

Happy Saturday!!

Today we bring you a Sketch Challenge!! Audrey created this very cool sketch specifically for this blog challenge:


And Audrey's incredible layout using the sketch:


We challenge you to use this sketch to create your own layout. Please be sure to link your work to this blog post. We might just spotlight your creation here on the blog!!

Enjoy your Saturday!!

Friday, May 16, 2008

Eye SPY!!

Holy Guacamole!! I just spent an hour perusing the Spring Survival Member Galleries! What a talented group of participants we have in this session!! I wanted to pick a few favorites and SPOTLIGHT them here on the Blog!

It was really difficult to pick favorites because so many of the layouts inspired me. So much so that I just ordered 100 prints from Walgreens for a scrapathon tomorrow!

So I made myself pick one layout from each week's gallery. Here are some awesome layouts from the Spring Survival members!!

Week One - Andi


Week Two - Scrappysoccermom


Week Three - Mel


Ladies - thank you so much for sharing your work!

If you have layouts to upload - please do so - who knows - you might be highlighted here on the blog when Eye Spy returns!!

Have a spectacular day!
Lisa

Thursday, May 15, 2008

A Summer Sneak Peek... Sort Of :)

Well you asked for it didn't you???? I have been eyeing these Trinkets Beads from Maya Road for quite sometime. While visiting Audrey in England, I got an up close and personal viewing of the Tutti Fruity ones, and they are so pretty and fun! I have chosen an assortment from the three styles available (Birds of a Feather, Hearts and Butterflies, and Tutti Fruity) for the Summer Survival Kit, and I am giving you a first-hand sneak peek exclusively here today! :)


So let me know what you think! I can't wait to hear!!! And I can't wait to play!!!

Wednesday, May 14, 2008

Glimmer Mist!!!


This week in the Spring Survival class - Emelyn Magpoc shared some great how tos and tips on using Glimmer Mist.

Here is a highlight!

Use it as a mask

Spray flowers with it


Spray plain chipboard with it


Go and try that bottle of Glimmer Mist today. Don’t stop with the cardstock, chipboard, and flowers…try it on the fabric or ribbon or alpha stickers. The possibilities are endless!

You can still sign up for the Spring Survival class only on the Homegrown website where you will have acccess to all of the Spring Survival lessons. Sign up now and get the whole scoop - including instructions and tips on how to use Glimmer Mist

http://homegrownscrapbooks.com/Merchant2/merchant.mvc?Screen=PROD&Store_Code=HS&Product_Code=SSK2PO&Category_Code=11SPSK08

Thanks Em!! You Rock!

Tuesday, May 13, 2008

Member Spotlight -Mommym - Michelle Airheart

Today we bring you an in depth look at member Michelle Airheart, known as Mommym on the message board.


Hello All,
I am Michelle and I live with my wonderful husband of 15 1/2 years, Wade and my 2 children, Cole age 11 and Bailey age 9 in New Mexico. Before children I taught 3rd grade for several years, worked for the state of Texas in their Income Support Division, and for Brazos County for their Juvenile Probation Division.

In addition to staying busy home schooling my kids I am a very accomplished taxi driver for afore mentioned children. We stay very active in church activities and are the Young Adult leaders at Tramway Community Church. We enjoy spending time together as a family doing many activities. We are blessed to get to travel frequently. We enjoy playing games together, bike riding, and attending basketball games. Fortunately, this gives me plenty of picture taking opportunities that I need to scrapbook.

What got you started scrapbooking?
Like most people I began scrapbooking "for real" once my son was born in 1997. At that time I did not enjoy it as much as I do know. First of all I was overwhelmed with the idea that albums must be up to date and in chronological order. Once I freed myself of this idea the creativity began to flow. I came to the conclusion the books were for my family, friends, and me to enjoy. Now I do not mind if I have a baby picture and recent pictures next to each other. My favorite part of the process is pulling out the pictures and remembering the moments the pictures represent. That, to me, is the most important part of the scrapbook.

What product is your absolute favorite go-to?
I generally keep my pages very simple so my favorite products are 3 different pens---black, brown, and white. I prefer to hand journal and these pens are in constant use. I was just given a Cricut Expression and that would be my next favorite must have product. I have a wonderful room for scrapbooking so I generally scrapbook at home while listening to 80's music. I mainly scrapbook 12x12 and use WRMK D-Ring Linen Albums. I decided on these a year ago after many years of album agony. I do scrapbook other sizes but mainly as gift albums.

How many survival kits have you do so far and what is your favorite?
This is my first Survival Kit and I am totally hooked! I ordered it and the summer survival kit sight unseen. This was an easy decision based on Stephanie's past kit choices. I figured that the designers would offer great samples to stretch me to use papers and product I might not normally use. This has been totally true and I am so pleased with the results if I am willing to step out and try something new.

Thank you for sharing with us Michelle! It is so nice to get to know you better!
Anita Letts

Monday, May 12, 2008

Designer Lift!

Good morning!

Friday's blog post featured Rebecca's Corner - we highlighted the My Son layout by Rebecca Sower.

Today we share Kathleen Taylor's lift of Rebecca's layout!


I love how Kathleen expanded her layout to include two pages while the frame around both pages ties it all together. She also expanded from one picture to three for more versatilty. Excellent lift! Thank you Kathleen!!

Here is a closer look:


Enjoy your Monday!!
Lisa

Sunday, May 11, 2008

Hot Blogs and Etsy Stores!!

So, what have you been doing this weekend?

Well, I spent a couple of hours last night, window shopping online and I've found some great Etsy stores I'd love to share with you! Gosh, where have I been all this while! Yeah, I have to admit I've just discovered Etsy (www.etsy.com) recently, talk about me being "shopping" savvy!! lol!

Here's what I found at "Little Pretty Studio" (http://www.etsy.com/shop.php?user_id=5171200)


Aren't these AMAZING?? The makers, Jennifer and John, called them "hoop.de.doo". I love the sound of the name and I just find them so creatively done! Who would have thought to use the embroidery hoops as bulletin boards?? Definitely not me! ;)

These fun, bright and bold patterns of handmade embroidery hoop can simply be used as a bulletin board, or as an inspiration board or you could even decorate them in any part of your home.

And you know what? I just found out that the maker, Jennifer, is none other than the Jennifer Pebbles (http://www.paperandink.typepad.com/)!! Yes, she's the uber talented Jennifer who designs for American Crafts, Autumn Leaves, A Muse Artstamps, Making Memory and Two Peas In A Busket!! And seriously, I have to smack myself for not knowing this earlier but then again, I was just too busy ogling and drooling at her "hoop.de.doo"....................... ;)

Alright, just before I go, here's another Etsy shop that I have to share with you.


The owner, Jen, made these beautiful and colorful felt brooches! Just looking at them made me happy. I love how she combines the colors tastefully and if you don't see the combination of colors that you want, just let her know. She'll be able to accommodate your color preference.

You could visit her at her Etsy store, "The Littlest Bean" (http://www.etsy.com/shop.php?user_id=5156084&order=§ion_id=&page=1), for more of her felt accessories.

Happy Shopping!
Leena Loh

Saturday, May 10, 2008

Ad Challenge!!!

Happy Saturday!
One of the features we hope to bring you on a regular basis is a variety of challenges. A Saturday morning boost to get your creative juices flowing.
This week Emelyn Magpoc brings you our very first in the form of an ad challenge!

Em picked a vey cool ad to use as her inspiration!


Your challenge is to create a layout inspired by this ad. Once you complete your layout - link it in the comments section of the blog for others to enjoy! You never know - we may feature some of your work on the blog to inspire others!

Here is Em's awesome layout:


I hope this gives you some fun ideas to create your own layout.
Don't forget to add your link in the comments so we can see what you create!

Have a wonderful day!
Lisa

Friday, May 09, 2008

Rebecca's Corner

Happy Friday!!

Today we are once again treated with an inspiration from Rebecca Sower. Her Spring Survival Layout this week is fun and whimsical - accenting with a variety of patterned papers!


The frame of paper squares draws your eye to her focus - the wonderful picture of her handsome son. A small accent on the right hand of the picture adds detail while the arrows direct you to the title.


Check back on Monday to see Kathleen Taylor's lift of this very cool layout! Kathleen expands the inspiration to a two page layout! You won't want to miss it!

Have an inspiring day!
Lisa

Thursday, May 08, 2008

Spring Survival Lessons Only Still Available!

Good morning!
Today is the day - Spring Survival Week 2 lessons are posted. I know everyone is very excited to see what inspiration the designers have for us this week!! This week's lesson consists of 25 pages of goodness!

Remember - this is a six week class - each week you will have access to a lesson. Each lesson includes 10 layouts with detailed instructions, a sketch of each layout and tips from the designers. All of the layouts are wonderfully liftable!

The best part - if you have not signed up already - it is not too late!

You can still join us! Go here if you want to sign up today!


Not only can you enjoy the weekly lessons - you will also have access to a members only forum and gallery!! You can chat with others working on the same projects, share your layouts and ask questions!

In addition with well over 60 layout ideas, sketches, tips and inspiration - just think how much of your stash you can use up!!

We look forward to meeting you - when you sign up - please be sure to stop in the forum and say hello!!

Have a super day!
Lisa

Tuesday, May 06, 2008

Fabric Flowers!!

I absolutely love working with fabric. It intimidates me sometimes, but after learning how to make fabric flowers – the fear is gone. I am absolutely addicted to making flowers! So – I wanted to share this easy technique with all of you!


You can use any type of fabric – I have tried this with cotton, felt, tulle and ribbon! One of the examples is very wide, cream colored ribbon I purchased on sale at Michaels after Christmas – OK – January 2007.

There is no steadfast rule on measurements. The longer the strip of fabric – the fuller/bigger the flower. The wider the strip – the larger the width of the flower. I cut strips of flower – about 1 to 1.5 inch wide and 8-10 inches long.


You can use your sewing machine or hand stitch a straight stitch down the length of fabric about ¼ inch from the edge. (I used my sewing machine – just FYI – I have never created a garment with this sewing machine – I bought it for scrapbooking and taught myself – so – I have only sewn lines and very few curves!!)


If you hand stitched – hold one end of the thread and “scrunch” up the fabric – gathering it together to create the flower. If you used your sewing machine – select one end of the fabric piece – you will see two pieces of thread – hold on to one and scrunch as above.

Once the scrunching is done – the flower will take form. Sew the ends together and stitch the sewn ends together to form a circle

TIPS: You can play with this too! Before you sew – accordian fold the fabric at one inch intervals – hold the folde fabric in one hand and cut a ½ circle. When you unfold the fabric – you will see a scalloped piece of fabric. Proceed to sewing (the non scallop side) and you will have defined petals like the blue flower above (which is the fabric from the Spring Survival kit!!) You can also cut a V in the fabric instead of a ½ circle and you will have pointed petals!

Here is an example of a flower in a cluster on a layout.


I hope you give this a go! I would love to see your flowers! Please link a pic in the comments section!

Have a peaceful day!
Lisa Woodhart

Member Spotlight- April Holguin

Each week we want to celebrate YOU - the wonderful members of Homegrown Scrapbooks. Anita Letts will be hosting the member spotlight. This week - we get to know April Holguin a little better!!


My name is April and I will be 27 on May 13th. I live in sunny SW Florida. I am a SAHM to 4 boys, ranging in ages 3 to 14. I have been married to my best friend for 9 1/2 years. I am a Sunday school teacher for my church and enjoy reading.


When did you get started scrapbooking?
I started scrapbooking in 1999 when my first son was a baby, I took a break and came back to it in 2005 and have been going strong since.

What is your favorite, go-to item to use?
Ink, I love to ink everything, it adds great dimension to the page. I also love anything bling, I try to add sparkle every chance I get.


Do you have someone you admire most in the industry and why?
I admire anyone who sits down to scrap, I get so tired of hearing " I wish I could do that". I always tell them that they could - all the have to do it try. Practice makes perfect. So my hat comes off to all the scrappers who take the time to learn and sit down and scrap.

What inspires you most to scrap?
My inspiration comes from my children and their personalities. They each have a unique personality and I try to let that show through on the page. My inspiration also comes from all the great product out on the market and my need to shop and hoard.

What is your process when you go to scrap?
I start by picking out pictures and matching them to paper, from there I either free style it or find a sketch that I like to use. It usually helps if I walk away from a page in progress, even if it's 5 minutes, I usually feel refreshed and have new ideas flowing when I come back.


Thank you April!
Homegrown Scrapbooks appreciates you!
Anita Letts

Monday, May 05, 2008

Spring Survival Designer Lift!


Each week of Spring Survival lessons shares one designer lifting the project or layout of another designer - and sharing what inspired the within the original layout!


This week Emelyn Magpoc lifted the "zoo" layout by Lynn Wilson!


Here is Lynn's fun layout titled ZOO.


And here is how Emelyn described the inspiation she gained from Lynn's layout:


I was inspired by the photo and patterned paper placement on Lynne's layout. I substituted the strip of cardstock going down the middle with a Bazzill Just the Edge strip. I made journaling strips in place of the journaling box. I also tied in the “Remember” word on the patterned paper with the Scenic Route chipboard circle “Don’t Forget”.

Emelyn's lift titled: My First


We would love to see your lifts - please feel free to link your work in the comments section!!

Sunday, May 04, 2008

Product How-To: Crop-A-Dile BIG BITE


A FEW DIFFERENCES FOR THE BIG-BITE CROP-A-DILE II:

1. Top Cube (Male side) There is a large post (large eyelets)
Flat side (flat top snaps)
Small Post (small eyelets)
Round -- Concave circle (round top snaps) -- Now has the ability to set the We R Memory Keepers Grommlets. Looks like a metal donut.

2. Tip Make sure you have the right 'punch or setting' picked. Move Orange slide on top all the way to the tip to set your eyelets, snaps or grommlets. Move Orange slide back so 1/8 is highlighted. This allows you to punch a 1/8" hole. Move Orange slide back so the 3/16 is highlighted. This allows you to punch a 3/16" hole.

3. Using the Ruler Guide
There are 3 different measuring guide on the base of the CADII. From top to bottom, the guides are for the 1/8" hole punch, the eyelet setter and finally for the 3/16" hole punch.
Each has its own ruler/depth guide since the distance from their position on the tool to the ruler is different. The Setter portion is farther out than the 1/8" hole setter, etc.
You really only need to use this if you want to have a row of holes and/or eyelets the same distance in from the edge of the page, otherwise, just leave the orange sliding guide pushed all the way to the back of the tool.

Directions on how to use your Crop-a-dile:

The easiest way to remember how to use the tool properly is to remember there is a top and bottom to the setter part.

The top cube is that cube that has the "pointy things sticking out"... Let's call that the MALE end of the tool. This part of the tool is ALWAYS ON TOP when setting an eyelet or snap.

The other cube is the 'setter' it's what flowers out the eyelets on the back.

Now, looking at the cubes,
On the Male end (top)
There is a large post (large eyelets)
Flat side (flat top snaps)
Small Post (small eyelets)
Round -- Concave circle (round top snaps)

The bottom cube,
There are 3 sizes based on the size of the 'tube' on the eyelet or snap. (large, medium, small)
and a cone hat shaped side -- this is to 'roll' the back of the eyelet vs. flowering it.

So, Large and Small eyelets are the easiest to set because you will have the post COMING DOWN FROM THE TOP (remember MALE on top) and will actually go through your eyelet to hold it in place while you squeeze the tool to set it.

Now, Snaps are trickier because there is no tube coming down from the top (it will either be a flat side or the round side on top).

I hold my paper up to my eye level when I set snaps so I can see where the bottom is sitting on the setter part and then squeeze.

I actually keep a finger on the top of the snap until I get the tool closed almost all the way. THis also helps stabalize it.

Ok, give a try again, and let me know if that helps.

REMEMBER... the cube with the Pointies (posts) is the MALE side of the tool and IS ALWAYS ON TOP when setting eyelets and snaps.

PLEASE feel free to post any questions about this tool in the Homegrown Forums to my attention.

Enjoy!
Kimber McGray

Saturday, May 03, 2008

Idea Book Review


Page Maps Sketches for creative layouts by Becky Fleck!


WOW – this is an awesome book. If you love sketches then you should look at this book.
There are a few stand out things about this book that I want to share with you.

1) Versatility – this book includes a variety of sketches for all types of scrappers. Including 12x12, 81/2x11, single page, multi page, one photo, many photo. It has it all!

2) Ease of use – I was thrilled to find out the book was spiral bound – lately there have
been so many idea books poorly bound – the spine cracks and the pages fall out. Not this time. Not only is it secure, but also the spiral makes it so easy to open and lay flat while you work on your project.


3) Each sketch includes photo measurements for ease of design.


4) Each sketch includes at least one completed page example!


5) This book is filled with little tips as well as eye spy which points out special little elements or design ideas featured on the layouts.


6) Best of all – at hte back of the book there is a set of laminated cards that you can punch out – even includes a storage box to keep them in. Each sketch is replicated on the one side of the card with a layout example on the other! Great way to take this treasure of inspiration with you wherever you go –to a crop – to the LSS for ideas – anywhere!


TIP FOR YOU! - I punched a hole in the corner of each card with my crop a dile and strung all the cards on a ring to ensure they stay together when I travel! (OK - for even when I don't because I want the whole deck to stay together! I feared losing one or two in my scrap mess...I mean desk!!)


Overall this book really impressed me – you can tell a lot of thought and love was put in to the creation of this fantastic scrap tool!


You can purchase the book at Amazon.com for $16.49 -that's 34% off the cover price of $24.99!!

Happy National Scrapbooking Day!! And don't forget - Homegrown has an NSD crop in progress and YOU are invited!!

Enjoy your day!

Friday, May 02, 2008

Rebecca's Corner

Spring Survival Special Guest Designer - Rebecca Sower

We are pleased to announce that our Guest Designer for the Spring Survival Program is none other than Rebecca Sower!

My love affair with Rebecca's vintage style began back in 2003 when I purchased her idea book, Scrapbooking Life's Little Treasures. I still have the book in my current idea books stack, though it is earmarked and worn almost beyond recognition.

I had the privilege of taking a class taught by Rebecca at CKU, and it was nothing short of amazing! I am so very excited to welcome her as our guest designer, and hope that you will enjoy her classic style as much as I do.

This week's focus project for Rebecca's Corner is a beautiful "Thanks" card. The unique combination of colors and distressed elements blends together perfectly, and the result is simply stunning. I can hardly wait to show you more of her exquisite work... but I will! Check back next week for more brilliant inspiration from Rebecca!


You can visit Rebecca at her blog.


Rebecca - thank you! We are truly honored!


Stephanie

Thursday, May 01, 2008

Spring has SPRUNG!!

Today is the DAY!

The kits are delivered – the design team has been working hard to create some incredible inspiration. All that have joined Homegrown Scrapbooks Spring Survival – be ready to go. Today is the day the inspiration begins. The first week of lessons will be posted today! Be on the look out!!

What can you expect from each lesson?

Well sit back and get ready as they are jam packed with ideas and examples!

Each week we will bring you a minimum of 10 layouts, cards and projects with complete instructions and technique tips. As the program progresses, the number of layouts etc. will increase as we receive more layouts from our international designers. You will also begin receiving program emails with tidbits, extras and teasers, so keep an eye on your inbox!

Now, if you've done the math, you realize that we will have way more than 60 layouts to showcase throughout the program. We will be posting the bonus layouts right here on our blog: http://homegrownscrapbooks.blogspot.com/
Be sure to bookmark it now!

In addition, we will have special reviews and articles from the Homegrown Design Team also posted on the blog. And that's not all...

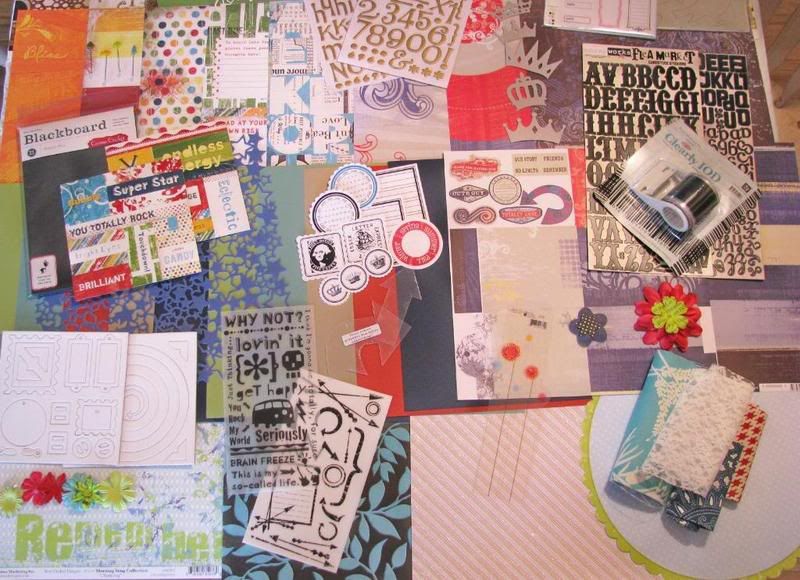
If you didn’t order the Homegrown Spring Survival Kit – no worries - it is not too late – the kits are all gone but you can still join the class. Click this link to order!
http://homegrownscrapbooks.com/Merchant2/merchant.mvc?Screen=PROD&Store_Code=HS&Product_Code=SSK2PO&Category_Code=11SPSK08
Be sure to stop by the blog daily as we share treats from the class – spotlight active members – review products and idea books - provide sketches, challenges and tips for inspiration – as the party continues all through Spring!!

Here is an example:


Technique Tip!
Layering elements such as papers, embellishments, flowers, die-cuts, chipboard and crystals altogether in a group on your layout create visual interest and creates more dimension!

Also –a sketch will be provided for each layout included in the lesson. That is at least 10 sketches a week!!

Here is a taste:


I hope you are all as excited as I am to take this wild ride. We look forwaard to seeing your work and admiring your talent! Please be sure to link layouts here and/or post them in on the message board.

Enjoy your day!!

Wednesday, April 30, 2008

Welcome! :)

Welcome back to the blog everyone! With all that is going on between the Stash Challenges and the Survival Program, we thought that a blog would help bring everything together and give us a chance to share more of what's going on behind the scenes. Over the past few months, Homegrown has "grown" ;) into such a fun community and we want to say thanks by providing you with this tool for special features, product reviews, sneak peeks and challenges. Thus, the re-birth of the Homegrown Blog!


We have a jam-packed schedule created by our new Blogmaster - Lisa Woodhart a.k.a. LisaNRoxy, and we can't wait to get started. The Program starts in just two days - are you ready???? Let the countdown begin!

Monday, April 28, 2008

Welcome Back!!


Welcome!


We have some very exciting news to share with you!

Homegrown Scrapbooks is excited to announce the unveiling of its brand new blog!

The Homegrown Blog will be updating on a daily basis, bringing you inspiration, challenges, product and book reviews, tips, techniques, sketches, sneak peeks of future kits and all of the fun happening at Homegrown Scrapbooks!

So be ready for the May 1 celebration of the Spring Survival program.


Come back tomorrow for a personal letter from Stephanie!

Wednesday, August 01, 2007

August Kits are here!

And, they are stunning! Hybrid features Cherry Arte and is the perfect kit for those end of summer memories. Trilogy features the lovely Scenic Route, Making Memories, and Autumn Leaves. We've, also, posted a special kit just for you Thickers lovers. We can't get enough of these and think you can't either. And, then we have our Fall Survival Kit. It's an incredible Fall kit and perfect for our next installment in our quarterly series.

Here are your links:

August DT Gallery
Hybrid Kit
Trilogy Kit
Thickers Kit
Fall Survival Kit