Holy Guacamole!
Marie Pilgrim has created an incredible tutorial for altering chipboard!
Technique Spotlight: Altering Raw ChipboardIf you’re like me, you’ve collected tons of raw chipboard in all different shapes and sizes. You’ve got alphabets, shapes, flourishes, mini albums, etc. Question is, what can you do with it? Well, I’ve got a few suggestions….
Foiled ChipboardYou will need a package of foils—mine are from Pinecone Press. You will also need an adhesive dot runner (I use the Herma Dotto by EK Success).

Here’s the process:
1. Roll adhesive dots all over your chipboard piece. Don’t worry if they don’t adhere perfectly on every bit of your chipboard; this will give your finished piece a textured, distressed feeling.
2. Select a colored foil and place it shiny/colored side UP over the adhesive dots.
3. Rub over the foil to transfer the color to the chipboard (I use a bone folder but you could use a popsicle stick) .
4. Carefully peel the foil off the chipboard and there you have it! A foiled chipboard piece!
5. If you want to define the edges of your piece, outline it with a marker. I used a blue Opaque Stix pigment marker by Marvy Uchida. It worked great, and the marker went over the foil without any problem.

Chipboard: Maya Road Chipboard Wings
Sparkly ChipboardSure, you could use glitter but it’s so messy! Instead, I used a light brown chalk inkpad from Colorbox, “Tiger Lily” Glimmer Mist from Tattered Angels, and “Cinnamon” Stickles from Ranger.

1. Ink the entire chipboard piece with a chalk ink pad and let dry.
2. Spray the entire chipboard piece with Glimmer Mist and let dry.
3. Apply a second coat of Glimmer Mist and let dry.
4. Use the Stickles to outline or define details on your chipboard piece and set aside to dry for a really long time.

Chipboard: Maya Road Chipboard Wings
Tip: I was trying to squeeze some Stickles out of the bottle onto a scrap of paper just to get the bottle started, when a giant blob of Stickles came bursting out! So I put the lid back on the bottle and grabbed a needle. I dabbed the needle in the Stickles blob and used it to outline my wings and to draw in the feathers. I liked this because I could control the application more easily than if I’d been squeezing the Stickles directly from the bottle.
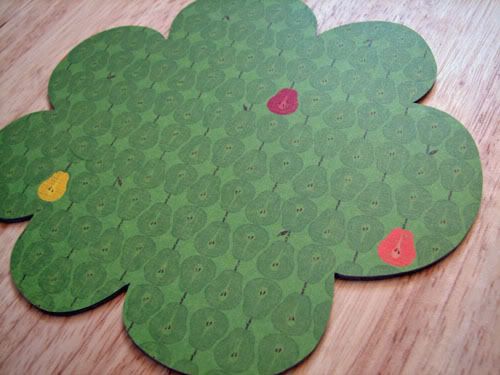
Patterned Paper-Covered ChipboardThis is my favorite technique! It’s a little labor-intensive but I love the result. The process is easy; it just takes a little more time.
1. Trace your chipboard piece on the patterned paper. I always lay the reverse of my chipboard piece on top of the reverse of the patterned paper and then trace. That way, any stray pencil marks will be on the back of my project, not the front.
2. Cut out the shape from the patterned paper.
3. Glue the patterned paper to the chipboard piece.
4. Optional (but it looks so cool!):Sand the edges of the patterned paper-covered chipboard piece. I use the Basic Grey file set because it works really well. If you don’t want to sand the edges try inking or painting the edges. Or, just leave them alone!

Chipboard: from the Maya Road Chipboard Tree Album (add-on)
Patterned paper:Scrapworks Magpie Pears and Starburst
Crackle-Painted Chipboard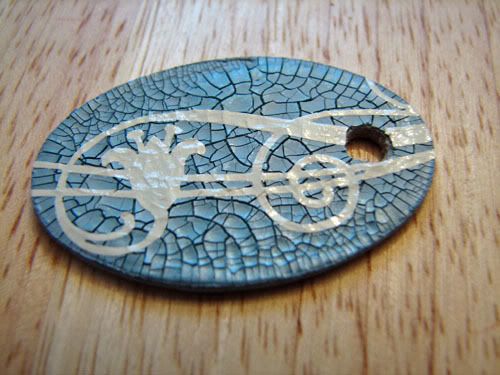
You could use regular paint, of course, but crackle paint is way more fun! I used Tim Holtz’s Distress Crackle Paint. This is the easiest technique of all!
1. Shake the paint bottle.
2. Apply a heavy coat of crackle paint.
3. Leave it alone; it will crackle as it dries.
4. If you like, you can rub the finished piece with pigment powders, chalk, or ink to emphasize the cracks. Then leave as is, or cover with a rub-on as I’ve done here.
Chipboard: label tag from the Maya Road Chipboard Wings keychain


